Chromebook End of Life Never Again
Annotation (Aug. 2021): Since this postal service was kickoff published (July 2019), we've learned that CloudReady (now owned by Google) tin can be difficult to get working on newer (2018 and later) Chrome devices. CloudReady may not support the devices' audio, Bluetooth, trackpad, or Wi-Fi. The Brunch project, while more than complicated to install and set up, may yield amend results installing a generic Chrome OS on Intel or AMD-based Chromebooks.
Also, starting with the 2018 Pixelbook, Chromebooks offer a "closed case" means of disabling writing protection, eliminating the need to open up the device and physically disable write protection.
For older, pre-2018 Chrome devices, this guide may notwithstanding be useful.
Chromebooks, the lightweight laptops focused on web browsing, receive updates to their OS for up to half-dozen.5 years, depending on when they were built. That's fine and good, and for the Chromebook's outset owners, that might be all they need.
But many Chromebooks work perfectly fine long beyond their official end-of-life engagement, especially if they were packed with relatively strong hardware when they debuted. You can go on using them beyond their official expiration, but doing and then means getting regular warnings that "This device is no longer supported," and they won't get security or feature updates. If you're browsing the web, security updates are a good thought.

Luckily, in that location is a solution for many Chromebooks. It usually involves simply a screwdriver, sometimes with some odd $.25, and rarely a fleck of electrical record. You'll do some weird stuff with a USB drive, and you'll have to type a couple things into a command prompt. When you're done, though, your Chromebook will be running CloudReady, a virtual clone of Chrome OS. CloudReady is intended to plough former Windows and Mac computers into snappy Chromebooks for schools and businesses. But it as well works well on Chromebooks, since information technology has many of the hardware drivers baked into information technology.
When you've got CloudReady installed, your device will go along getting security and feature updates, just a little behind the official Chromebook channels. Plus, it'southward a pretty fun and low-run a risk beginner's hardware project. Let's dig in.
Note: Before yous jump in, check to see if your Chromebook is included in either of the "FULL ROM firmware" columns on this supported devices folio for the Mr. Chromebox script . If your device only has a checkbox for RW_Legacy, you should probably skip this process. You may be able to install CloudReady with a BOOT_STUB firmware, merely I've never done it, so yous're on your own if something gets tricky.
If at any bespeak you hit a wall, it's piece of cake enough to return to a working regular Chrome Os setup. Follow Google's instructions on creating a recovery USB stick for your device , boot into recovery fashion, and run the recovery stick. You tin practise this even after you've enabled developer mode or removed the write-protect screw.
Footstep i: Back Upward Information and Brand a CloudReady Installer
Generally, yous won't have as well much stuff stored on your Chromebook's tiny hard drive, and everything near your browser should be synced to your Google business relationship. Merely check your Downloads folder, just in case. Move anything you desire to go along to either Google Bulldoze or onto a USB drive. Nosotros're going to wipe the Chromebook's storage, twice!
Before we wipe the Chromebook, you might desire to use it to create the USB stick for installing CloudReady Home Edition. You tin also use a Windows or Mac computer, if that'south easier. Download the appropriate file from Neverware, and then follow the instructions for making a USB stick into an installer. From experience: if it seems like everything is right, but the installer just won't piece of work, endeavour a different USB stick. They're finicky, and sometimes the inexpensive or costless ones volition piece of work when the expensive one y'all actually bought will non.
Step 2: Remove Your Chromebook'southward Write Protection
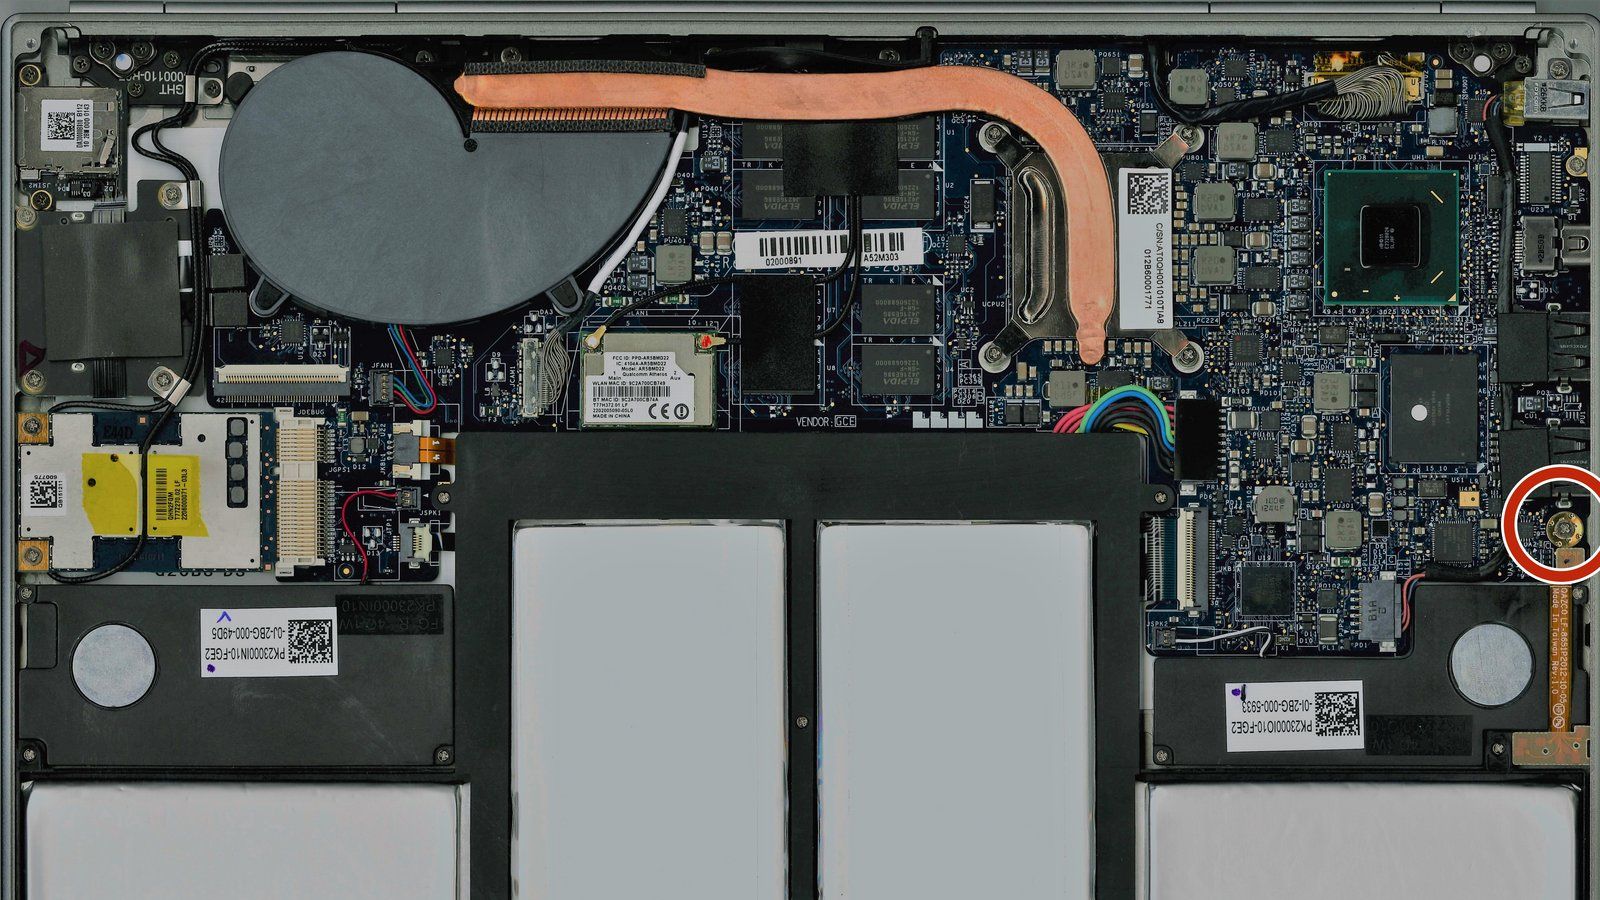
You lot can actually do this first, if you similar, but it makes sense to back up your files and make the USB installer before we tinker with hardware. Most Chromebooks have a special screw on their main board, one that connects to metallic pieces and completes a circuit that protects the deeper parts of their firmware. Past removing this screw, nosotros're opening upwardly the storage for writing CloudReady onto the device.
The write-protect screw (or sometimes a sticker, or, rarely, a jumper) is in a different location on every Chrome device. You can search iFixit to see if nosotros've got a guide to removing the write-protect mechanism on your specific auto—I contributed to the guide for the 2013 Chromebook Pixel write protect screw. If we don't have a guide, you can Google (or DuckDuckGo!) for "write protect [name of Chromebook]," replacing that bracket with your Chromebook model. You can try for either the generic name of your Chromebook ("Acer Chromebook 14"), or wait on the device for the specific model number ("CB3-431-C5EX"). For older Chromebooks, you can also check the device's page on the Chromium Projects to meet if the details are there.
These are the notable (and firmware-supported) Chromebooks about to run out of updates equally of this postal service, but patently there volition be more over time. I've linked write-protect removal instructions for each:
- Toshiba Chromebook
- Samsung Chromebook 3
- Lenovo'south Thinkpad 11e from 2014 (on page 22 of the service manual (PDF), which we love to see)
- Lenovo N20
- HP Chromebook eleven and Chromebook fourteen,
- Acer C720
I've rarely been stumped with the location of a write-protect screw after a couple searches. Even if a teardown or how-to guide doesn't specifically telephone call it out, you can oft find it yourself. On many Chromebooks, the write protect screw looks different than others, with a wider rim of segmented metal around information technology. Sometimes information technology even has a "WP" characterization and arrow pointing at information technology.
By the manner, if your Chromebook is 5-6 years old when you open it up to remove the write protection? You might want to consider replacing its battery, since you've already got information technology open. We sell a few tested batteries for older models.
Step 3: Enable Recovery Mode, Then Developer Mode
With write-protect disabled, it's time to dig deep into your Chromebook.
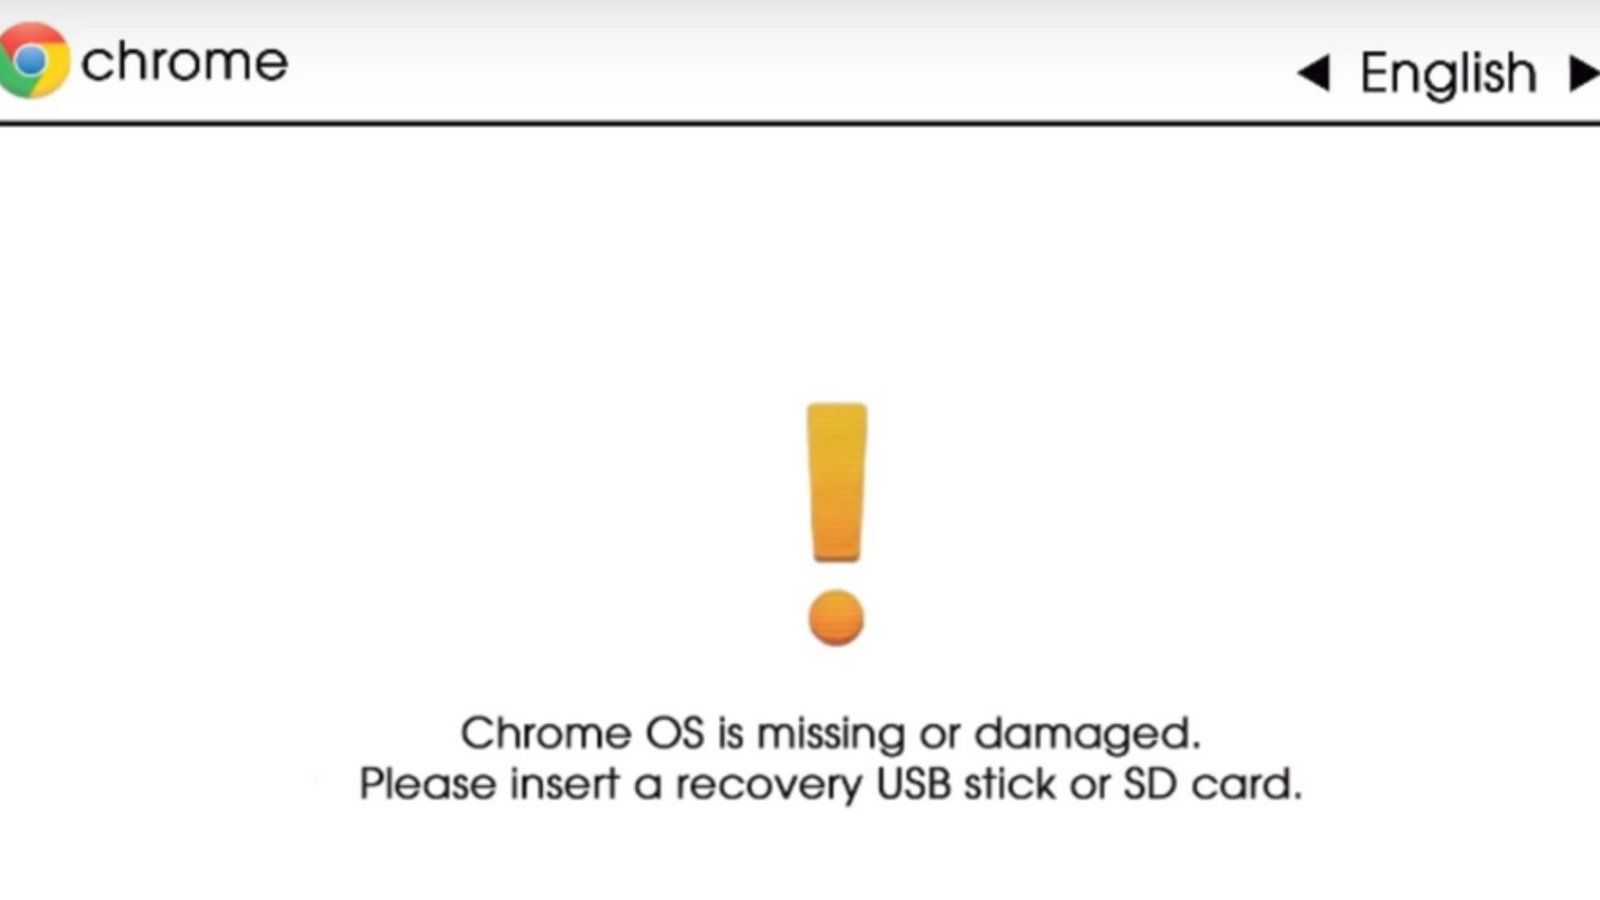
Kickoff, you need to kicking the device into Recovery Mode. Generally, this ways belongings downwardly the Esc and "Refresh" keys (the page-reloading round arrow symbol, two or three keys to the correct of Esc), then holding down the Power push button until the device powers off (if it was on), or pressing the power cardinal briefly until the device turns on. If it worked, you'll run across either "Chrome Os is missing or damaged," or "Please insert a recovery USB stick or SD card."
When yous come across this scary message, concord the Ctrl key and press "D."
You'll go a screen asking if you desire to disable Bone verification. You lot practice, so press Enter. Your Chromebook will wipe itself and reboot once or twice. You'll land at yet some other scary screen: "OS verification is OFF, press SPACE to re-enable."
Yet again, yous will hold the Ctrl key and printing "D." It's not listed anywhere; it'due south just the "I'm a developer, this is okay" shortcut. It's a expert thing we're hacking this firmware, considering you'd have to do this every time you booted your Chromebook, otherwise. Eventually, you lot will land on the same setup screen you lot saw when you starting time ready your Chromebook.
Step four: Install a New BIOS
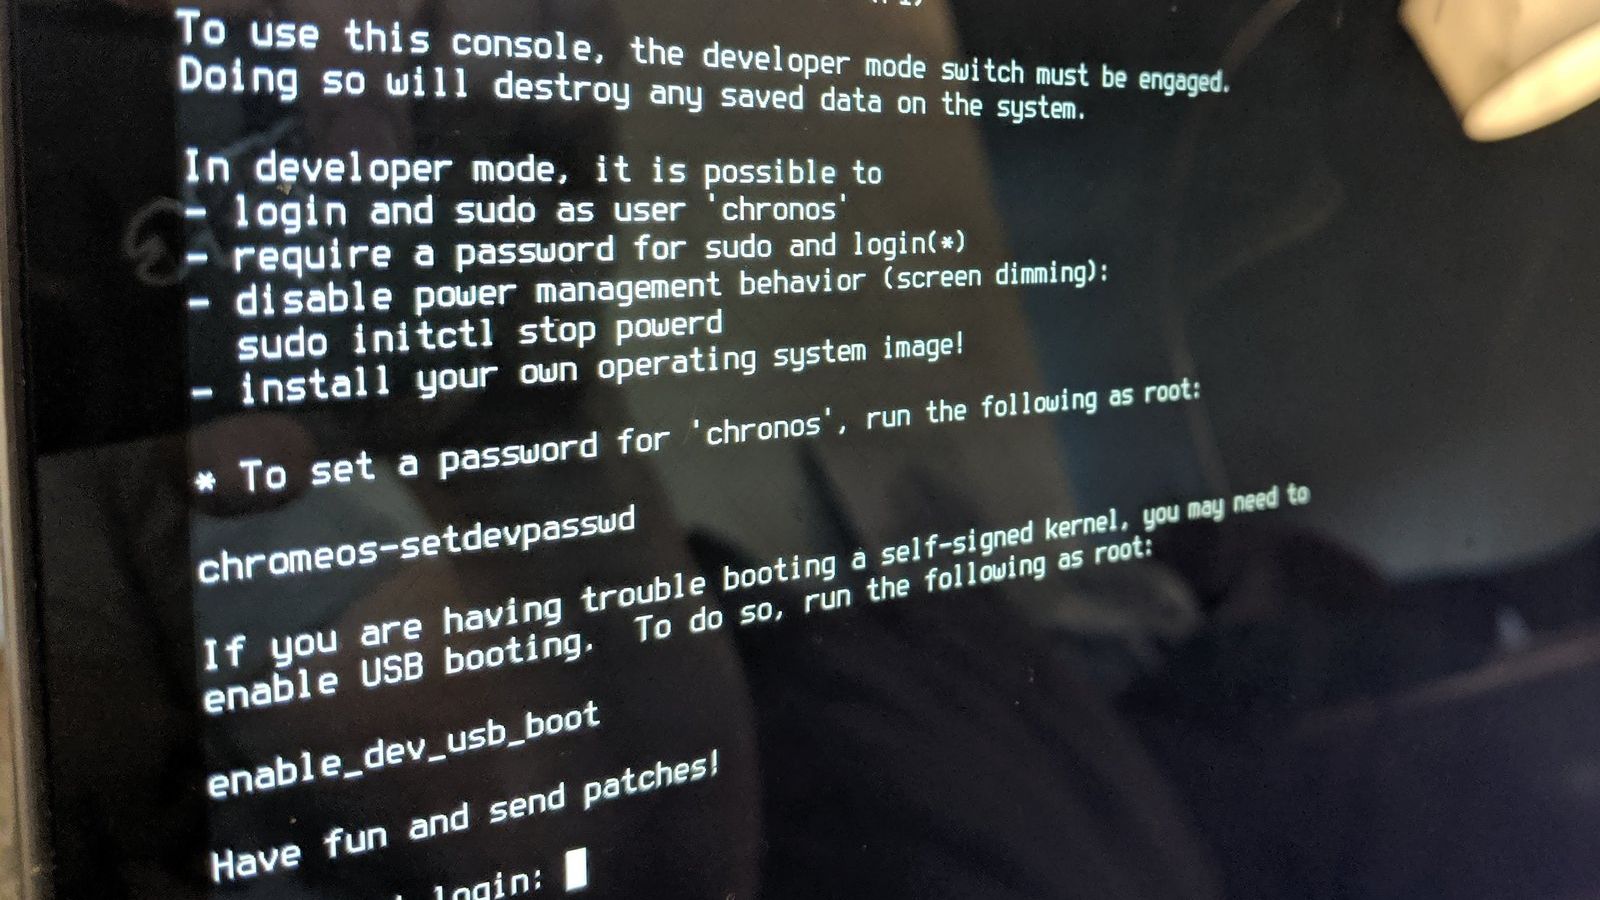
Click whatever buttons ("OK," "Allow'south get," etc.) on the setup screens to get to the function where you choice your Wi-Fi network. Select your Wi-Fi and connect with a password, but don't go any farther. Hold down Ctrl and Alt and printing the second key to the correct of the Esc central, whether that's a "forward" or "refresh" pointer. You'll flash over to a stark-looking terminal, simply you'll only be hither for a few minutes.
On the control line, type in 1 command to download and run the MrChromebox script, which can install a new BIOS on your Chromebook suitable for installing a new system. As of this writing, the command beneath is current, but bank check the site, simply in case.
cd; curl -LO https://mrchromebox.tech/firmware-util.sh && sudo fustigate firmware-util.sh
Note that the 2nd character afterwards the first dash is a uppercase "oh" O, not a zero.

After running that command, yous'll get a menu. At the top, it shows you the device, CPU, firmware blazon, and whether write-protection is enabled ("Fw WP: Disabled"). If this script says your write-protect is still enabled, you'll need to look up what you might accept done wrong, and endeavor over again. Otherwise, choice the choice to "Install/Update Full ROM Firmware" (usually the third option). The script volition do its matter (perhaps asking you to confirm yous want to exercise this one more time). When it's washed, enter "P" and so hit Enter to power off your Chromebook.
Congratulations: your Chromebook is no longer special! It'southward simply similar a regular laptop at present, so we tin can kicking up and install CloudReady.
Stride 5: Install CloudReady
Plug the CloudReady USB stick you lot made into your Chromebook. About USB ports should work, but a few Chromebooks will not let y'all boot from a blue (USB 3.0) port. When you see the running bunny on your new boot-upwardly screen (howdy, new BIOS!), press the Esc key. On the BIOS setup screen that appears, tap the Down fundamental until yous finish upwardly at Device Manager. Hit Enter, and and then choose whatever looks similar your USB fundamental in the listing of devices that comes up.
The next thing you should come across is a setup screen for CloudReady, which looks a lot similar the setup screen for Chrome Os. Endeavour out a few things while this screen is up: motion the cursor with your trackpad, endeavour entering your Wi-Fi password, and make sure your Chromebook can connect via Wi-Fi. If that seems good, yous don't have to continue going through CloudReady's setup—that is technically to set upwardly a temporary "alive" session. You can click on the settings console in the lower-right corner and choose "Install CloudReady."
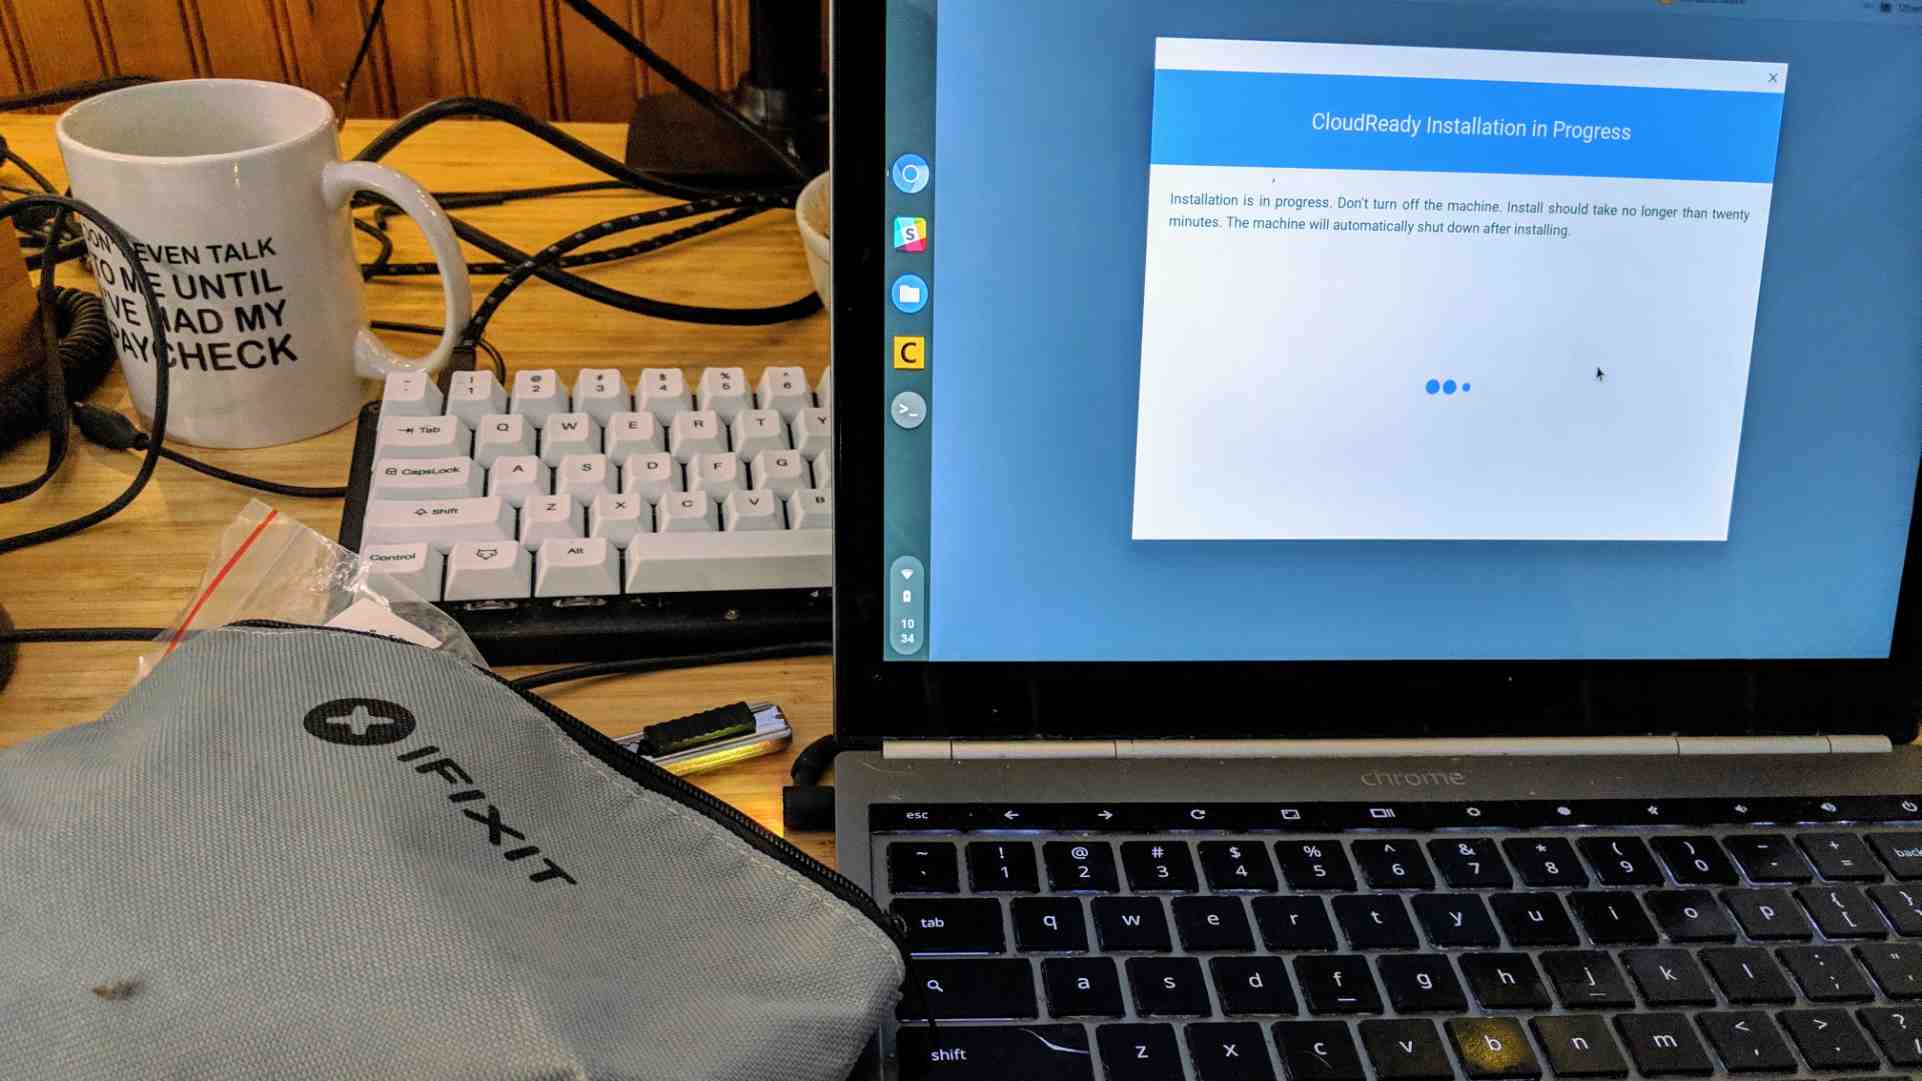
Now comes the culmination of all your work. CloudReady writes its open up-source copy of Chrome Bone deep into your Chromebooks' storage. Your laptop boots up like a regular laptop, without warnings or loud beeps. And you've got a modernistic, secure web browser to use again.
This post, originally published July ii, 2019, was republished on Aug. 25, adding a note at the meridian regarding compatibility and newer Chromebooks.
Source: https://www.ifixit.com/News/30282/how-to-get-updates-on-your-end-of-life-chromebook
0 Response to "Chromebook End of Life Never Again"
Post a Comment